how to polish your rims
UPDATE: This Blog is no longer active as of 10/22/06.
How to polish your rims
This is a project that takes time and patience. You will be wet sanding and it makes a mess and your finger nails will be black for a while, the ladies will be impressed. The important thing is to sand long enough with each grit to remove the scratches from the previous grit. If you rush through the grits, you will end up sanding much longer with a finer grit to remove scratches from early grits.
Here's what you need:
-A variety of sand paper, I had
180 grit
240 grit
320 grit
400 grit
600 grit
1000 grit
1200 grit
1500 grit
2000 grit
- Mother's Wheel polish
- Blue Magic Wheel Polish
- any automotive carnuba type paste wax in a can
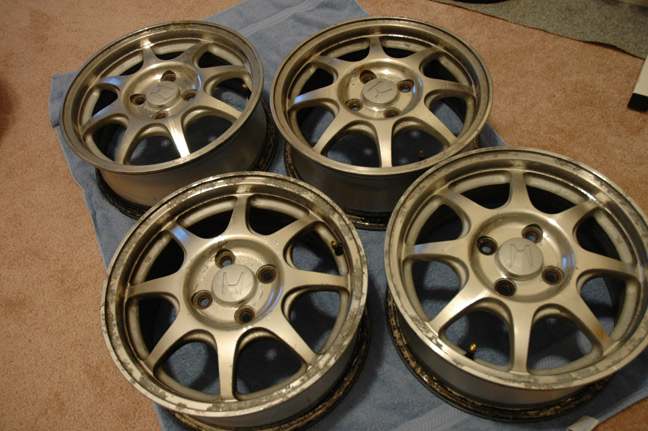

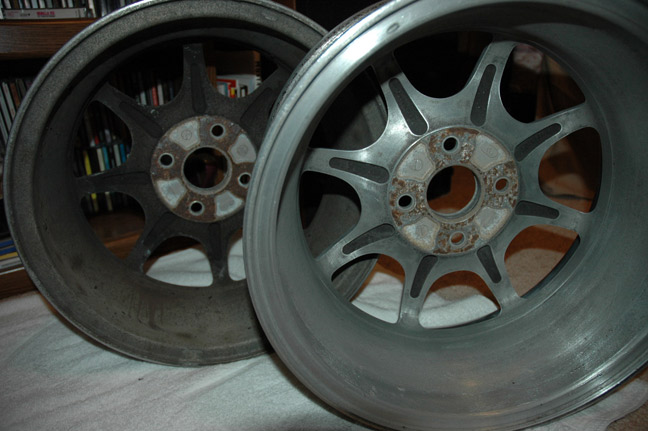
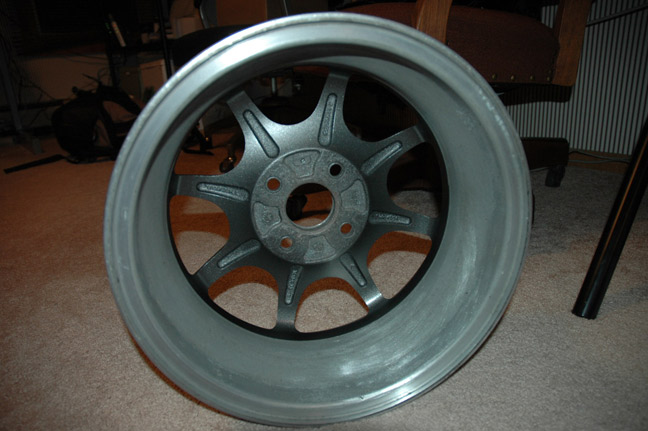
Here is of lightweight rims from a civic hx. As you can see they are badly corroded. They are painted silver from the factory, but had already had most of the paint stripped before I bought the car.
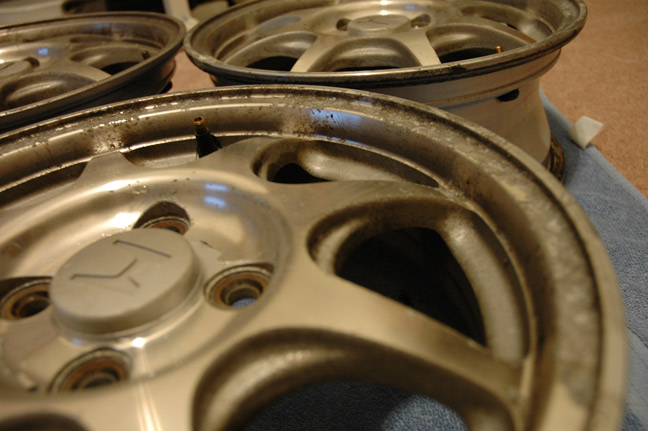
I began with 180 grit on these because there was so much corrosion to sand through. I sanded so much that I probably made them even lighter lol, yet still could not get through all the corrosion on the lips. You could start with 240 on a cleaner set of rims. You want to sand all the lines out of the factory machined surface.
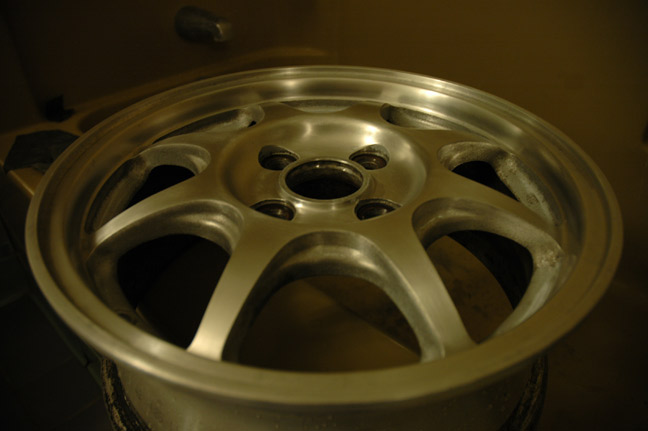
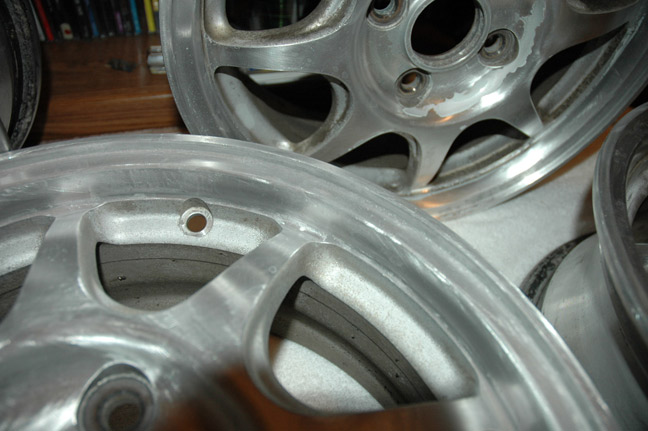
Some pics after sanding with 400 grit
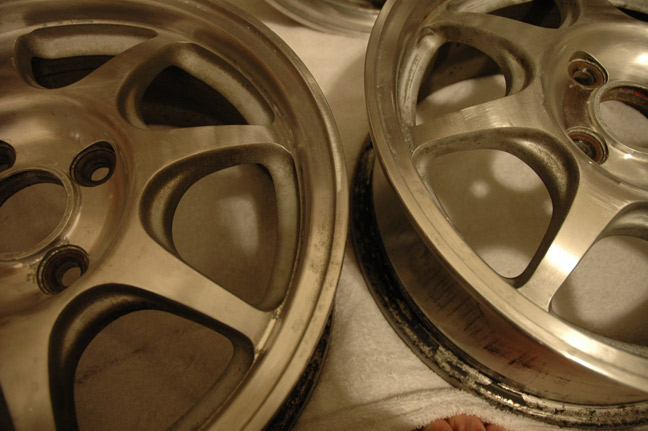
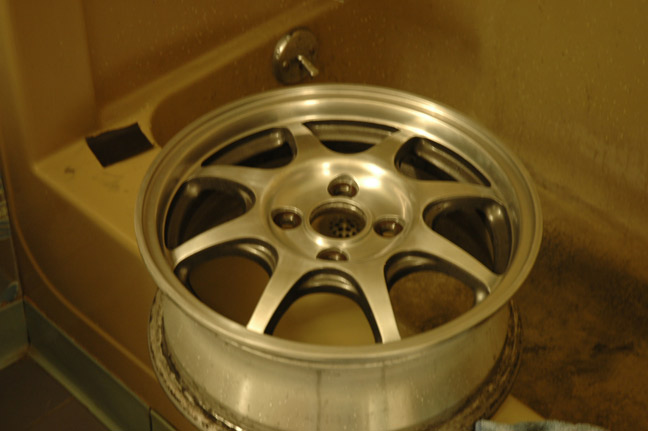
After 600 grit
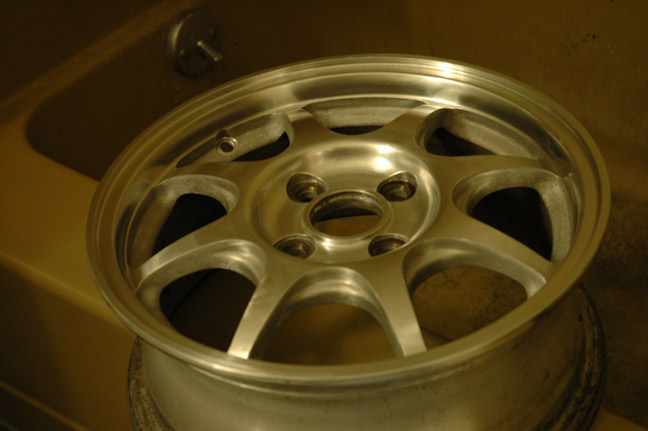
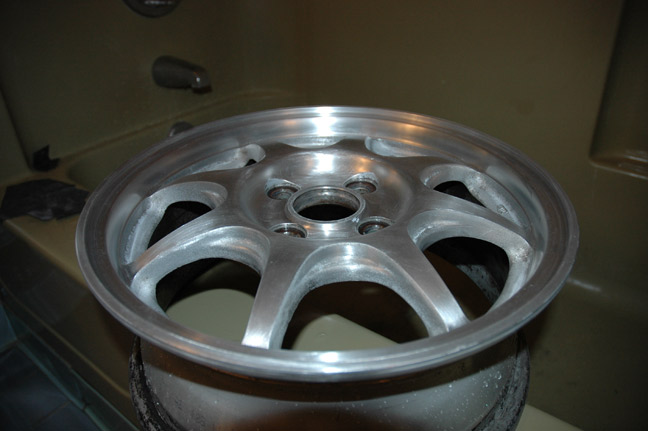
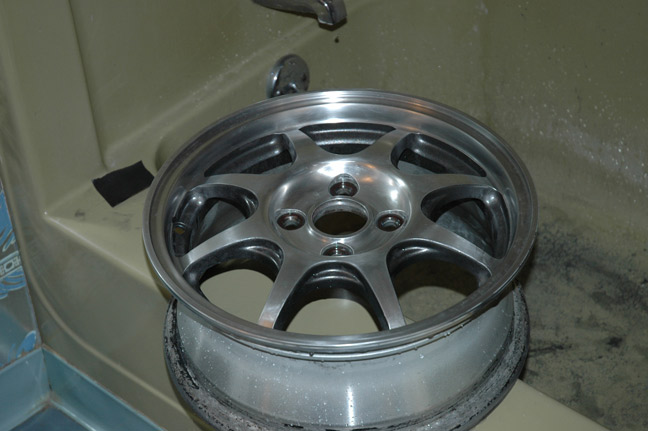
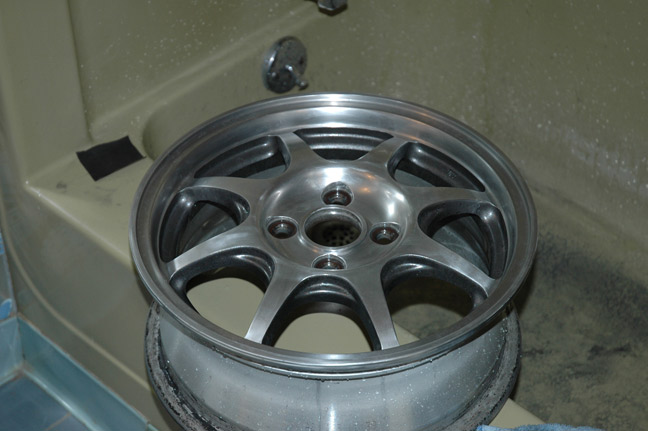
After 1000 grit
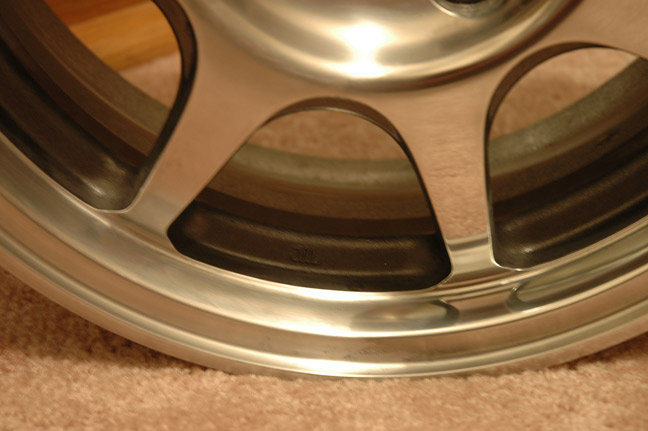
Be sure to clean the inside of the rims as well so you can have the stick on weights put there rather than on the outside of the rim you just polished. I just used 180 grit to get the dirt off.
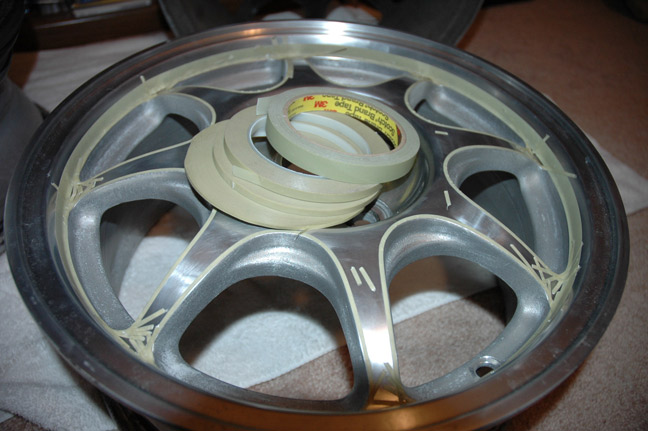
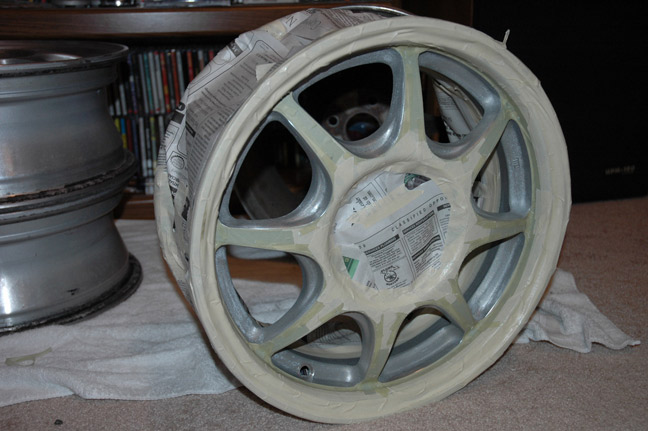
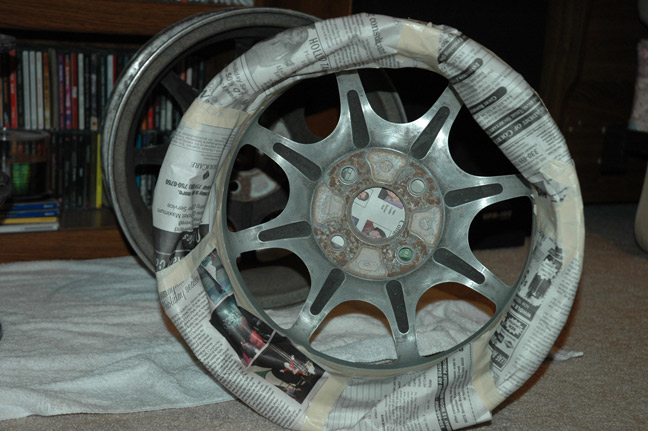
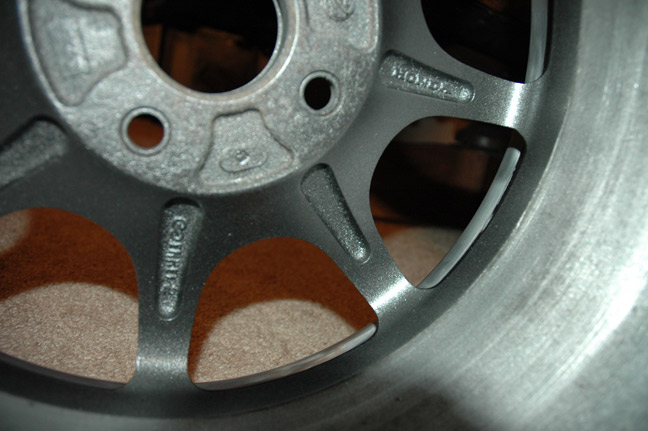
On the first wheel, between 1000 and 1200 grit, I masked off all the inset areas between the spokes to be painted. I did this before the 1200, 1500 and 2000 so that the rough edges from the masking tape would be sanded smooth as I finished the surface.
I sprayed them with Duplicolor Wheel Coating, Graphite
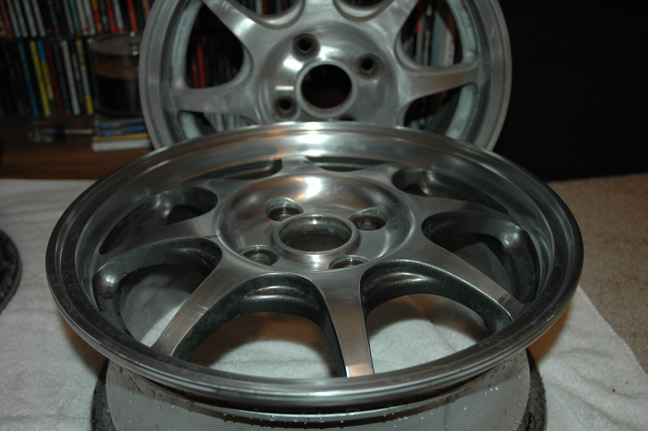
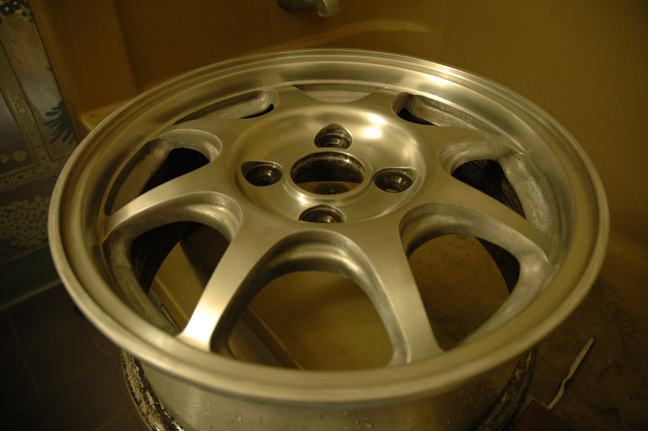
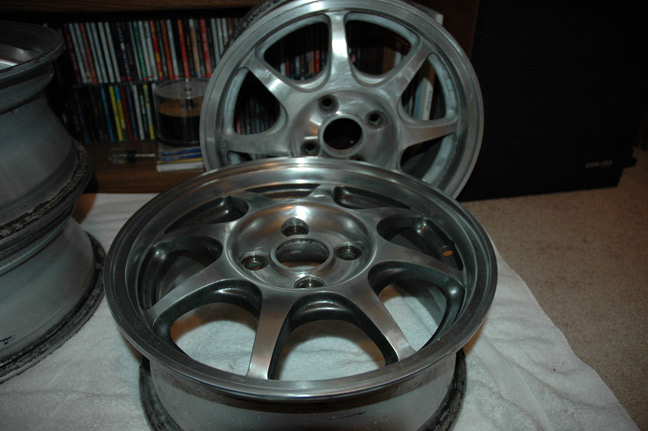
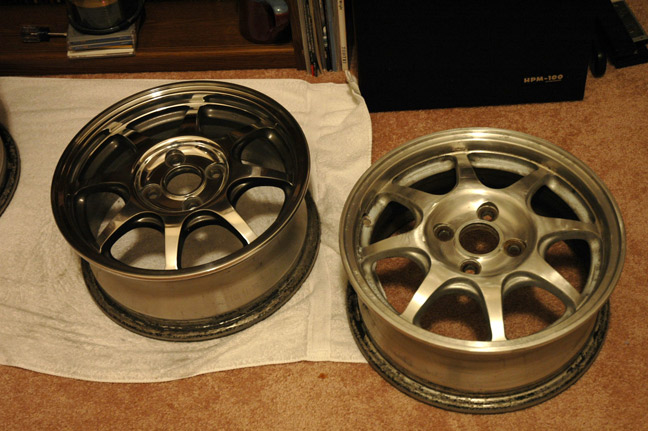
These are after sanding with 1500 grit. The rim in the background is 180 grit to show how far it has progressed.
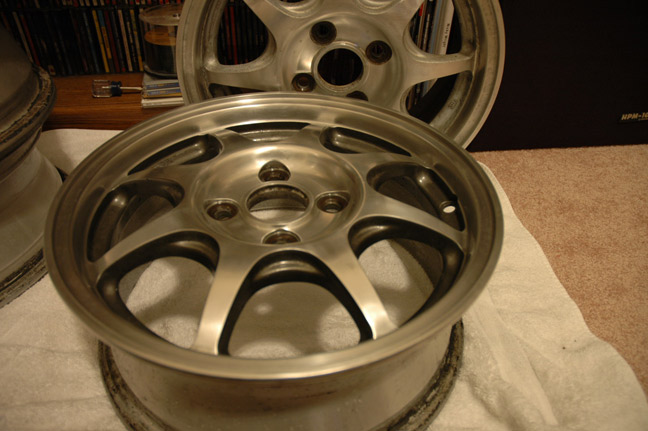
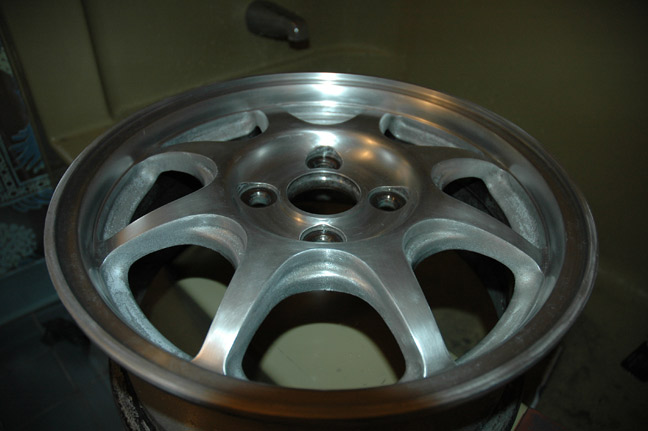
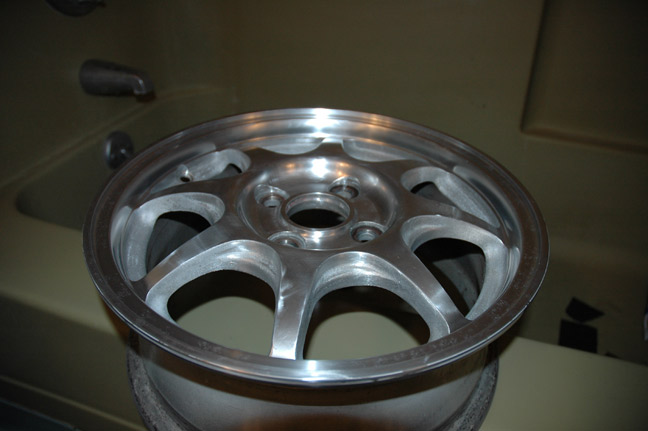
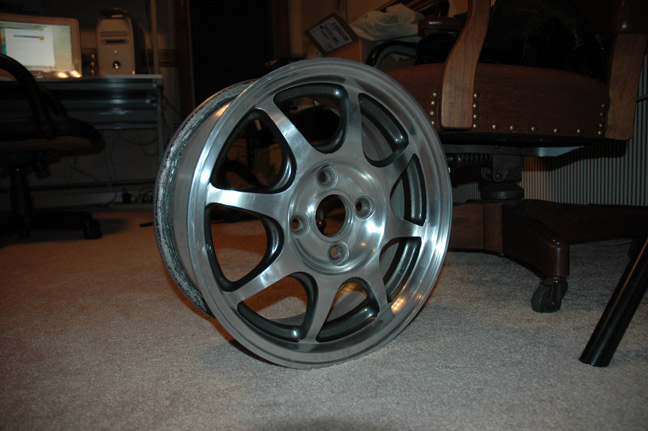
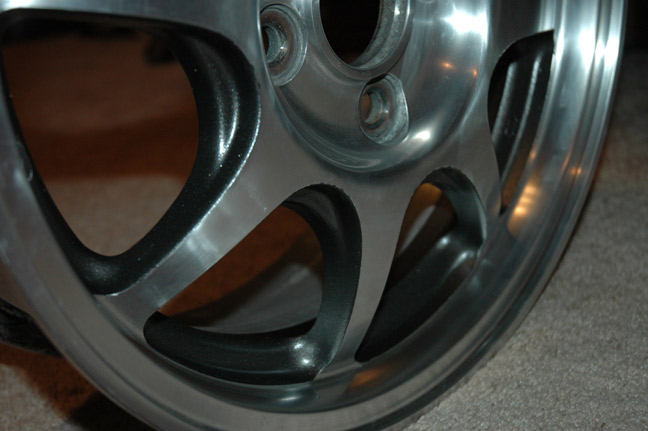
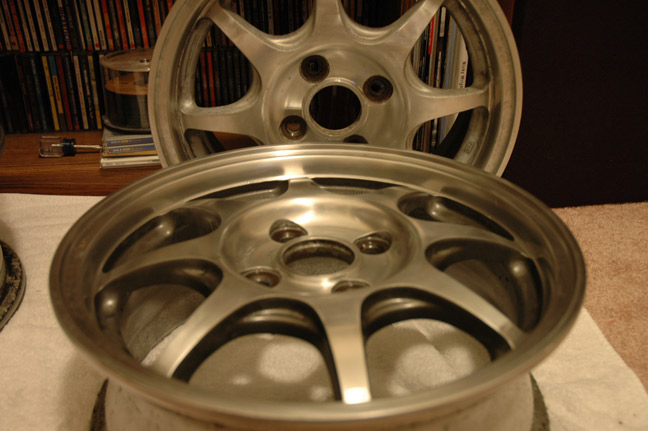
after 2000 grit... almost done!!
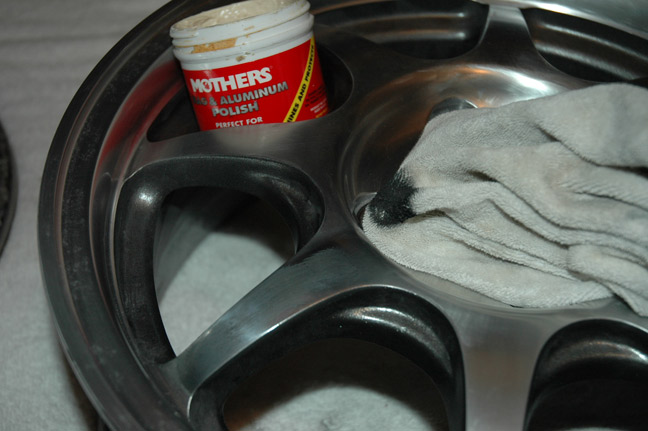
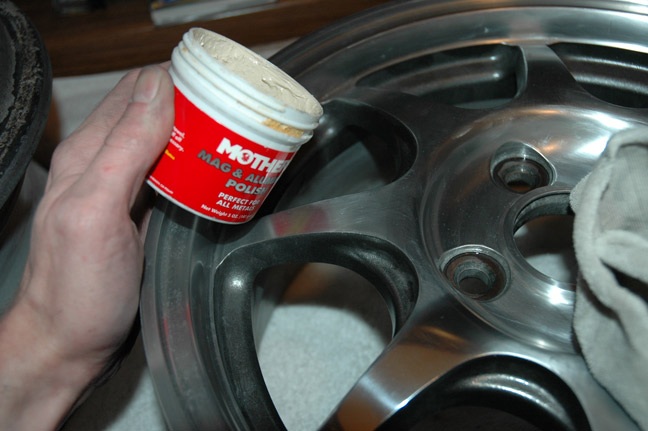
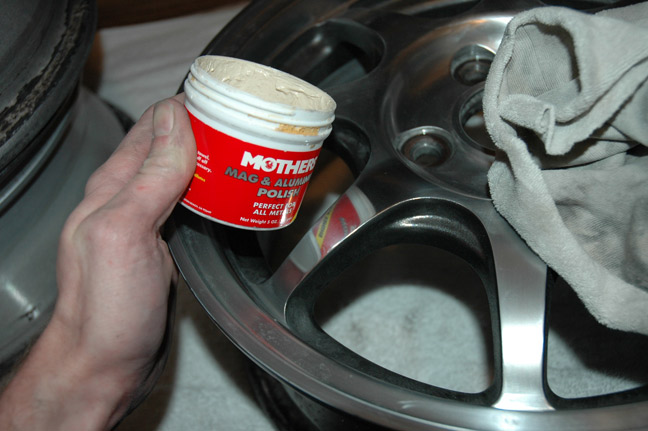
Mothers wheel polish is good stuff, I have been using it for almost 10 yrs.
Just dab some on a terry cloth you dont use for anything nice (it turns black) and rub it on a section of the rim for about 30 seconds. Let it haze over for a minute after wiping and wipe the haze off with a clean cloth.
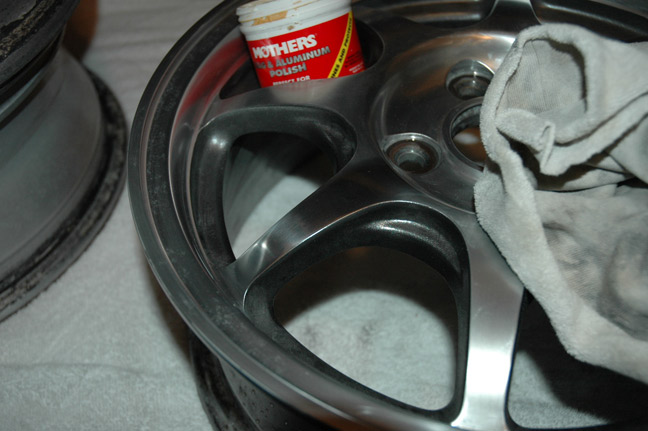
Done! (with that little area)
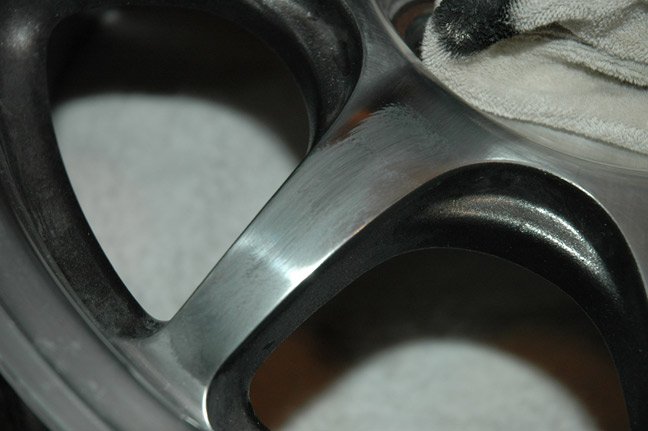
Spoke before Mothers
Spoke after Mothers
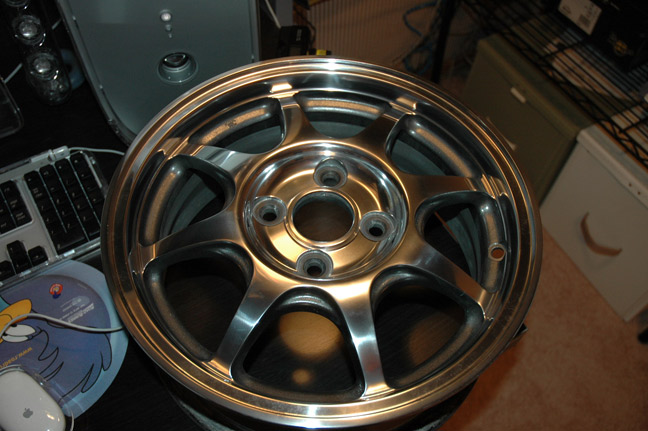
Half polished
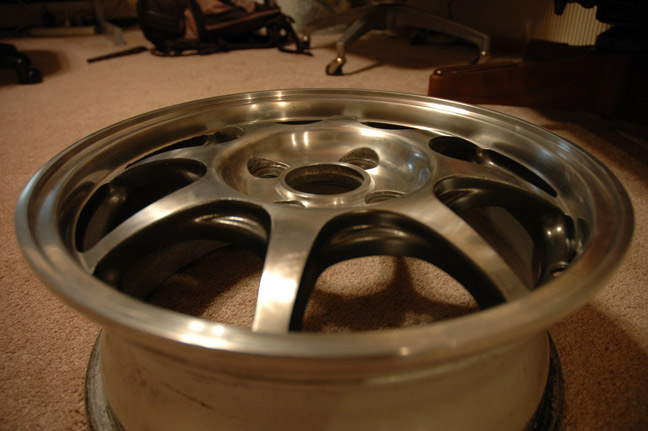
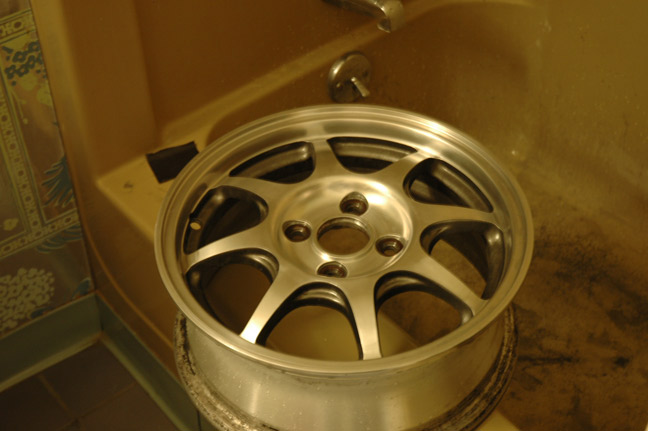
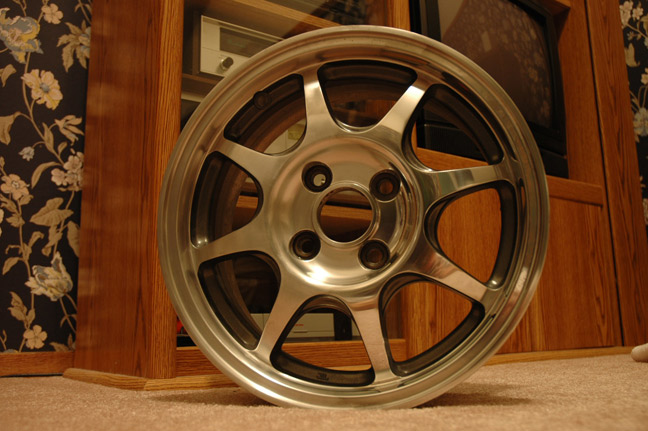
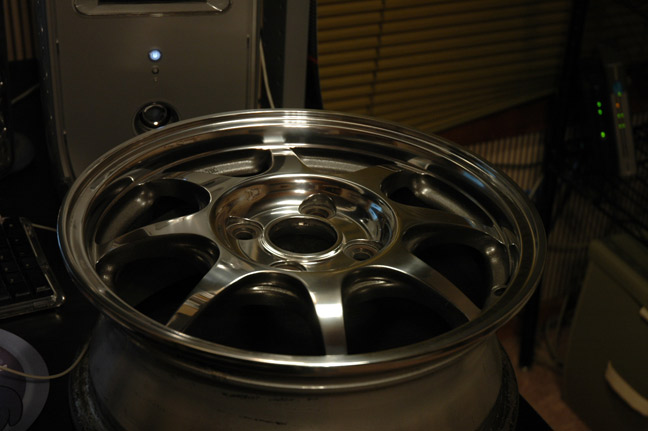
Complete!

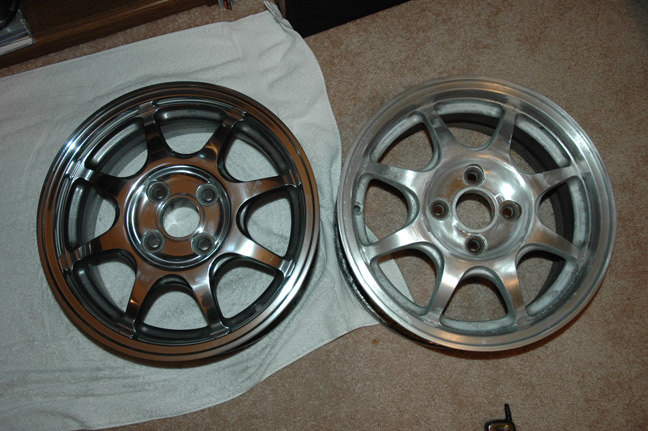
Compared to the 180 grit rim
Now I have 3 more to do!
Also not yet pictured, I find that waxing them with a wheel polish called Blue Magic will make them a little bit brighter. Mothers is an abrasive, but the Blue Magic is much finer. It removes what is left of the black oxidation from the Mothers.
Finally wax them with a coat of regular carnuba paste wax. This will act like a seal on the surface and keep them looking good after a rainstorm. On the inside, wax but do not wipe it off after it hazes. This will make it much easier to keep the insides of the rims clean in the future. They aren't clear coated, but I hope you wouldn't even think about using them in the winter anyways!
I found that a forum was much more useful in allowing viewers to ask questions, as well as post their own advice and images. On September 30, 2006, I launched www.Civic-EG.com [a forum dedicated to the 92-95 civic]

There's lots of how-to articles with pictures, members' rides, an interactive online wheel viewer for Civics and Del Sol, Classifieds section, Local area shows & events, and More! All future updates to my car can be seen at www.Civic-EG.com

_______________________________________________________
original article:
How to polish your rims
This is a project that takes time and patience. You will be wet sanding and it makes a mess and your finger nails will be black for a while, the ladies will be impressed. The important thing is to sand long enough with each grit to remove the scratches from the previous grit. If you rush through the grits, you will end up sanding much longer with a finer grit to remove scratches from early grits.
Here's what you need:
-A variety of sand paper, I had
180 grit
240 grit
320 grit
400 grit
600 grit
1000 grit
1200 grit
1500 grit
2000 grit
- Mother's Wheel polish
- Blue Magic Wheel Polish
- any automotive carnuba type paste wax in a can
Here is of lightweight rims from a civic hx. As you can see they are badly corroded. They are painted silver from the factory, but had already had most of the paint stripped before I bought the car.
I began with 180 grit on these because there was so much corrosion to sand through. I sanded so much that I probably made them even lighter lol, yet still could not get through all the corrosion on the lips. You could start with 240 on a cleaner set of rims. You want to sand all the lines out of the factory machined surface.
Some pics after sanding with 400 grit
After 600 grit
After 1000 grit
Be sure to clean the inside of the rims as well so you can have the stick on weights put there rather than on the outside of the rim you just polished. I just used 180 grit to get the dirt off.
On the first wheel, between 1000 and 1200 grit, I masked off all the inset areas between the spokes to be painted. I did this before the 1200, 1500 and 2000 so that the rough edges from the masking tape would be sanded smooth as I finished the surface.
I sprayed them with Duplicolor Wheel Coating, Graphite
These are after sanding with 1500 grit. The rim in the background is 180 grit to show how far it has progressed.
after 2000 grit... almost done!!
Mothers wheel polish is good stuff, I have been using it for almost 10 yrs.
Just dab some on a terry cloth you dont use for anything nice (it turns black) and rub it on a section of the rim for about 30 seconds. Let it haze over for a minute after wiping and wipe the haze off with a clean cloth.
Done! (with that little area)
Spoke before Mothers
Spoke after Mothers
Half polished
Complete!
Compared to the 180 grit rim
Now I have 3 more to do!
Also not yet pictured, I find that waxing them with a wheel polish called Blue Magic will make them a little bit brighter. Mothers is an abrasive, but the Blue Magic is much finer. It removes what is left of the black oxidation from the Mothers.
Finally wax them with a coat of regular carnuba paste wax. This will act like a seal on the surface and keep them looking good after a rainstorm. On the inside, wax but do not wipe it off after it hazes. This will make it much easier to keep the insides of the rims clean in the future. They aren't clear coated, but I hope you wouldn't even think about using them in the winter anyways!
posted by Brian at
7:25 PM
|
4 comments
![]()
![]()